The Facebook Platform uses OAuth 2.0 for authentication and authorization. You need to setup Facebook APP For Facebook Auto Post WordPress Plugin and connect this application to your blog and authorize it.
Please see the instructions below:
Facebook Configuration
1. Login to your Facebook account.
2. Go to the Developers page: https://developers.facebook.com/
If you are not registered as “Developer” yet, you need to click green button “Register as a Developer”. Click here to see the Register as a Developer instructions, otherwise proceed to the step #3.
FAQ: Question: Why I can’t create an app on developers.facebook.com/apps ? When I am trying to enter that page it redirects me back to my account?
Answer: Facebook “Business” or “Advertising” accounts can’t manage apps. Only real user accounts are able to create and manage apps. Please login to Facebook as a personal account to be able to create app.
3. Click “Apps -> Create a New App” menu item.

Fill “App Name”, leave “App Namespace” empty, select any category. agree to policies and click “Create App”, fill captcha, click “Submit”.
Important: Please use your own information, don’t literary re-type “Vivacity InfoTech” and other sample info.

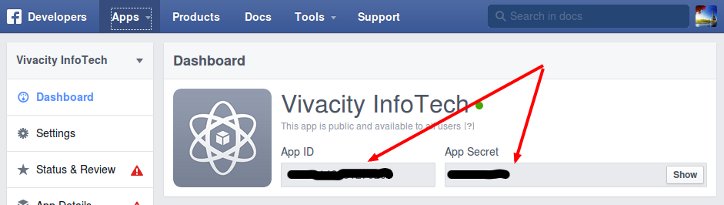
– Notice App ID and App Secret (Click “Show”, enter your password) on this page.
4. Click “Settings” on the left, click “Add Platform”.

5. Select “Website” in the list.

Enter your website URL to the “Site URL” field. Enter your domain to the App Domains. Domain should be the same domain from URL that you have entered to the “Site URL”.
Important!: You must enter the URL and domain that you see in your WordPress Admin Panel. For example your url is http://www.vivacityinfotech.com/ then use the www.vivacityinfotech.com/ as the doamin .

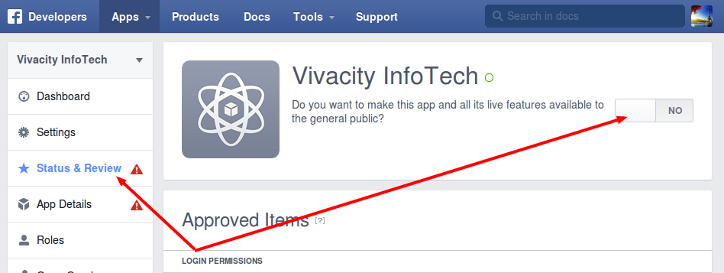
6. All Facebook apps are “Sandboxed” by default. All posts will be visible only to to Admins, Developers and Testers. You need to take an app “Live” if/when you would like your posts to be seen by everybody.
Click “Status & Review” on the lest. Change “Do you want to make this app and all its live features available to the general public?” switch from “No” to “Yes”.

1. Login to your WordPress Admin Panel, Go to the WP2FB Auto Post Options.
2. Fill “App ID” , “App Secret” and Page or Profile name from step 3 above.
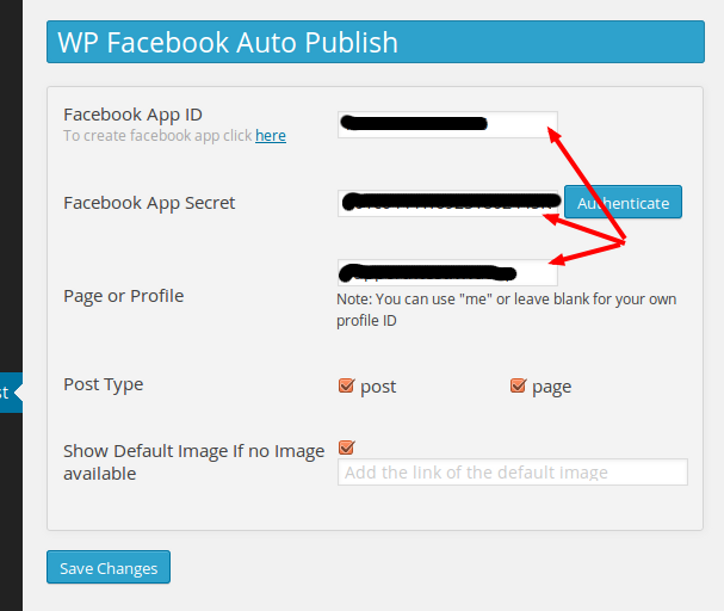
1. Click “Save Changes”. Notice new link “Authenticate Your Facebook Account”.
2. Click “Authenticate ” and follow the authorization wizard. If you get any errors at this step, please make sure that domain for your WordPress site is entered to your App as “App Domain”.
Important: If Facebook tell you that you need to switch to your main account, you will need to close the wizard, go to facebook.com, switch account, and then start authorization from the beginning.
[Update – May 2014] Facebook changed some rules regarding the apps. This means that the Facebook App, Facebook profile or page and the user who authorizes the app MUST belong to the same Facebook account. So please make sure you are logged to Facebook as the same user who created the app.
Important: When Facebook Authorization Wizard asks you for the access privileges to your profile/pages, do not uncheck anything and don’t click “Skip”.
Facebook don’t have the ability to request permission to just one page. It’s either all of them or none. If you click “Skip” it means you forbid Facebook from posting to any of your pages, groups or profiles.
Our plugin will post only to the page that you specify on the “Your Facebook URL” field.
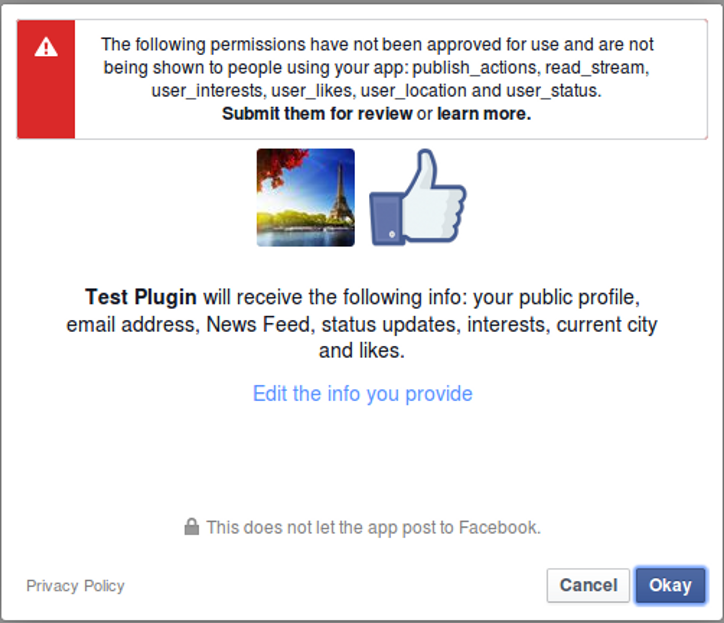
Note: Please don’t pay attention to the red message on top of the screenshot above, you don’t need to submit your app for review if you will be posting to the profile and pages you admin.
3. Your Facebook account is ready to use.